When using the Wi-Fi camera for the first time, you need to plug the camera into the LAN port of the router and configure the wireless settings for it. Here we introduce two ways for configurations: using Reolink Client on PC or Reolink App on smart phone.
Use Reolink Client to configure wireless settings
Use Reolink App to configure wireless settings
Use Reolink Client to configure wireless settings:
Step 1. Plug the camera to the router’s LAN port by an Ethernet cable. Make sure the camera is powered on.
Step 2. Make sure your PC is on the same local network with router, lauch the Reolink client software and login to your camera.
Step 3. Click on “Device Settings”.
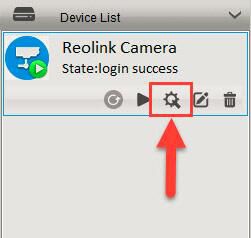
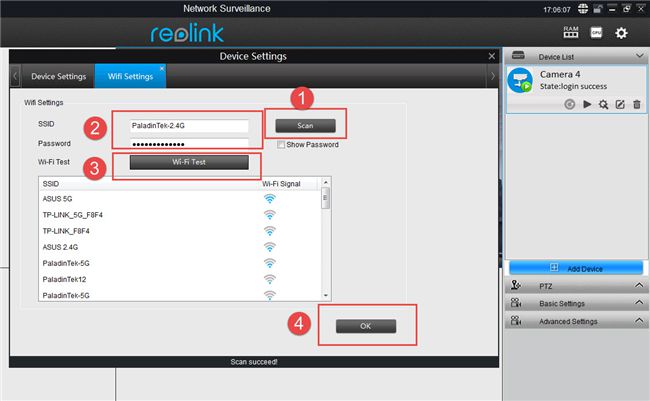
Step 4. Click on “WiFi Settings” under “Network“.

Step 5. Click on “Scan”, then double-click on the SSID you would like to connect and input its password, click on “Wi-Fi Test”, after it shows “Wi-Fi Test Succeed”, click “OK” to save the settings.
Step 6. Please disconnect the Ethernet cable between the camera and the router. Wait for a moment, the camera will connect to the router via Wi-Fi.
Use Reolink App to configure wireless settings:
If you would like to use the smart phone, please follow the steps below:
Step 1. Plug the camera to the router’s LAN port by an Ethernet cable. Make sure the camera is powered on.
Step 2. Launch Reolink App and login to the camera, tap the “Wi-Fi Settings” button.


Step 3. Please select the SSID you would like to connect and input the password in the “Password” field, tap on “Wi-Fi Test” to test the connectivity.


Step 4. If it shows the success message like this, then you can hit the “Save” icon on the top left-hand to save the settings.


Yet, if it shows the error message like below, turn to Troubleshooting-Wi-Fi Test Failed for help.

Step 5. Disconnect the Ethernet cable betweem the camera and the router. Wait for a moment, the camera will connect to the router via Wi-Fi.
😍 Liên hệ ngay với chúng tôi để nhận được tư vấn và hỗ trợ tốt nhất! 😍
Bắc Ninh Media
📞 Hotline: 0917658468 - 0222 6536789 - 0946748285
🌐 Website: https://bacninhmedia.com
🔗 Facebook: https://facebook.com/cameraquansatbacninh99
Bài viết liên quan
Dịch vụ Giải pháp Lắp đặt camera quan sát Tin tức cập nhật
Lắp đặt camera tại Xã Đại Đồng huyện Tiên Du
Dịch vụ Lắp đặt camera tại xã Đại Đồng huyện Tiên Du Bắc Ninh của Bắc Ninh Media. Bắc Ninh...
Tin tức cập nhật
Dịch vụ chúng tôi cung cấp thi công hệ thống mạng doanh nghiệp
Chúng tôi tự hào là công ty có chuyên môn có kinh nghiệm nhiều năm triển khai thi công...
Dịch vụ Giải pháp Lắp đặt camera quan sát Tin tức cập nhật
Lắp đặt camera tại xã Trí Quả huyện Thuận Thành
Dịch vụ Lắp đặt camera tại xã Trí Quả, huyện Thuận Thành, Bắc Ninh của Bắc Ninh Media. Bắc Ninh...
Tin tức cập nhật
Lắp đặt camera tại Bắc Ninh trọn gói giá rẻ
Lắp đặt camera tại Bắc Ninh là việc làm cần thiết cho tất cả các khu công nghiệp,...
Tin tức cập nhật
Danh sách phần mềm xem camera quan điện thoại
Hiện nay trên thị trường có rất nhiều dòng đầu ghi hình camera quan sát do đó cũng...
Tin tức cập nhật
Những lỗi thường gặp ở hệ thống camera quan sát
Hệ thống camera quan sát an ninh rất phổ biến hiện nay bởi nó giúp công việc quản...
Dịch vụ Lắp đặt hệ thống báo động báo cháy thông minh Thi công hệ thống báo động Tin tức cập nhật
Hướng dẫn sử dụng bộ báo động Aolin- 9088
I. Chức năng của các công tắc và các nút trên bàn phím trên tủ trung tâm...
Dịch vụ Lắp đặt camera quan sát Tin tức cập nhật
Nên mua camera kết nối điện thoại rẻ mà chất lượng nào?
Ngày nay, khi thời buổi công nghệ ngày càng phát triển, nhu cầu của người dùng cũng ngày...
Về chúng tôi Bắc Ninh Media
Target
The Ofice Building our Bac Ninh Media Company. COMPANY Introduction History Office Target Business Staffs Motto